Macros are a set of actions that to perform on Zendesk or Front. In order to work, Macros must be attached to intents. While Aide identifies intents automatically, you need to create or import Macros and attach them to intents to perform actions such as:
- Automatically tagging messages to reduce manual work and keep messages organized.
- Assigning conversations and setting fields like priority or status to triage messages correctly.
- Posting internal comments or replying directly to customers to instantly resolve common questions.
After creating or importing Macros, you need to attach them to intents and set them to Auto-run or Manual. This is explained below in the Attaching Macros section.
If you are a Front user you need to create your Macros manually and add actions to perform and then Attach them to intents and set them to Auto-run or Manual.
If you are a Zendesk user your Macros are automatically imported into Aide and you only have to Attach them to intents and set them to Auto-run or Manual.
Macros in Detail
Every Macro has a name, description, and a set of actions. For example, a Macro to automatically reply to users that submit reviews looks like the following:
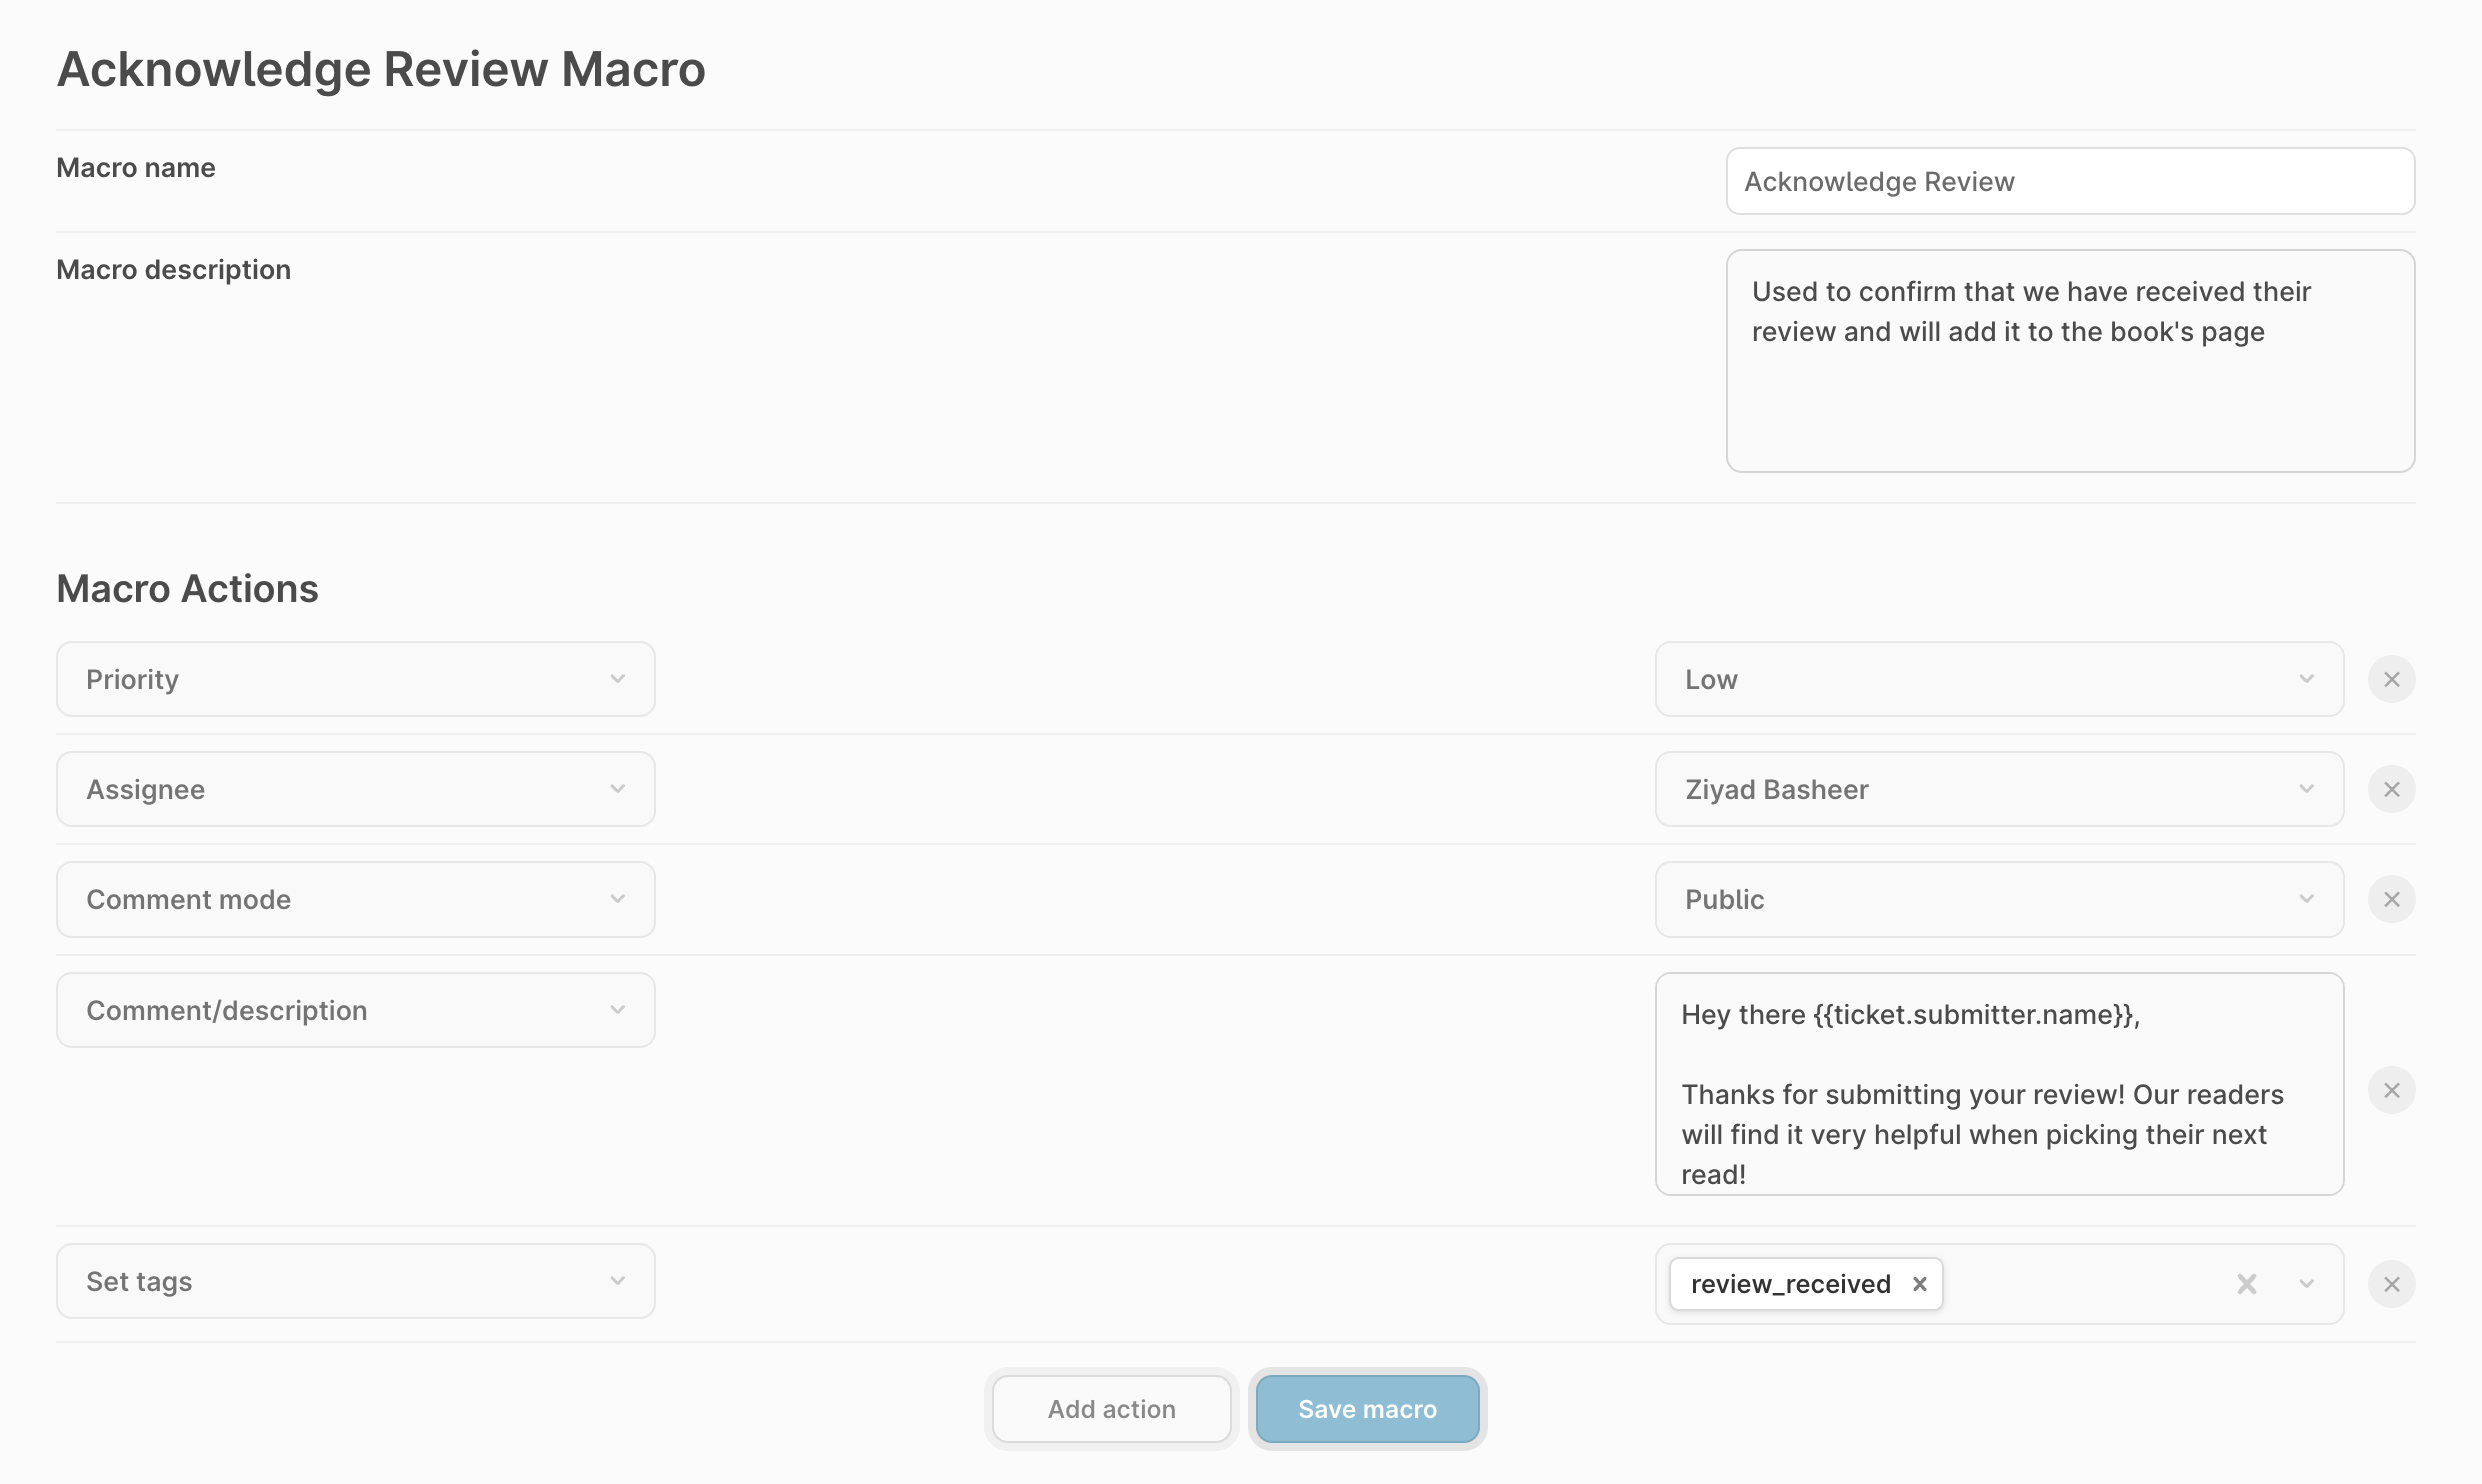
The Macro above contains 5 actions, Priority, Assignee, Comment mode, Comment, and Set tags. Each of those actions will be performed with the values on the right once the Macro is attached to an intent. The next step is to attach the macro to an intent.
A Macro only runs for the received customer message and is intended for only one message. So you will need a macro for every customer message with an intent.
Attaching Macros
You can attach multiple Macros to every intent and configure them to Auto-run or Manual. Auto-run Macros are applied automatically and are perfect for performing actions such as tagging and auto-replying to common questions. Manual Macros are for when you want your agents to apply the Macro manually. You can set this by using the “Auto-run” switch on every intent's page.
To attach a Macro, click on an intent from Topics page and navigate to Macros and click “+ add macro” which will give you a dropdown list of your Macros to select from. Once you've attached the macro, the Auto-run switch will appear.

Once attached, you will see the Macro in the macros column for every intent. Similar to the below example:

Auto-run vs Manual Macros
Since Macros are a set of actions to perform for a given customer message, sometimes you might want to apply actions automatically, at other times you want your agents to manually apply them. For this reason, there are 2 types of Macros in Aide:
- Auto-run Macros - applied automatically to messages that match the intent Macros are attached to.
- Manual Macros - must be applied manually by an agent. They are surfaced on the AI Assist widget when a message that matches the intent Macros are attached to is received.
For example, here are how you would use an Auto-Run Macro vs a Manual Macro:
- Attach an Auto-run Macro to an intent to automatically tag messages or auto-reply to customers.
- Attach a Manual Macros to an intent for agents to manually apply using AI Assist.
Here is an example of an Auto-run Macro and a Manual Macro attached to an intent as displayed in AI Assist with their actions:

Make sure to set your Macros to Auto-run for actions you would like to perform automatically for every message, such as setting tags, posting internal comments, or auto-replying to common questions.
Front Actions
Macros are similar to Front rules, but Aide detects intents from meaning to help you run the correct set of actions. Here's an example of actions in a Front Macro:
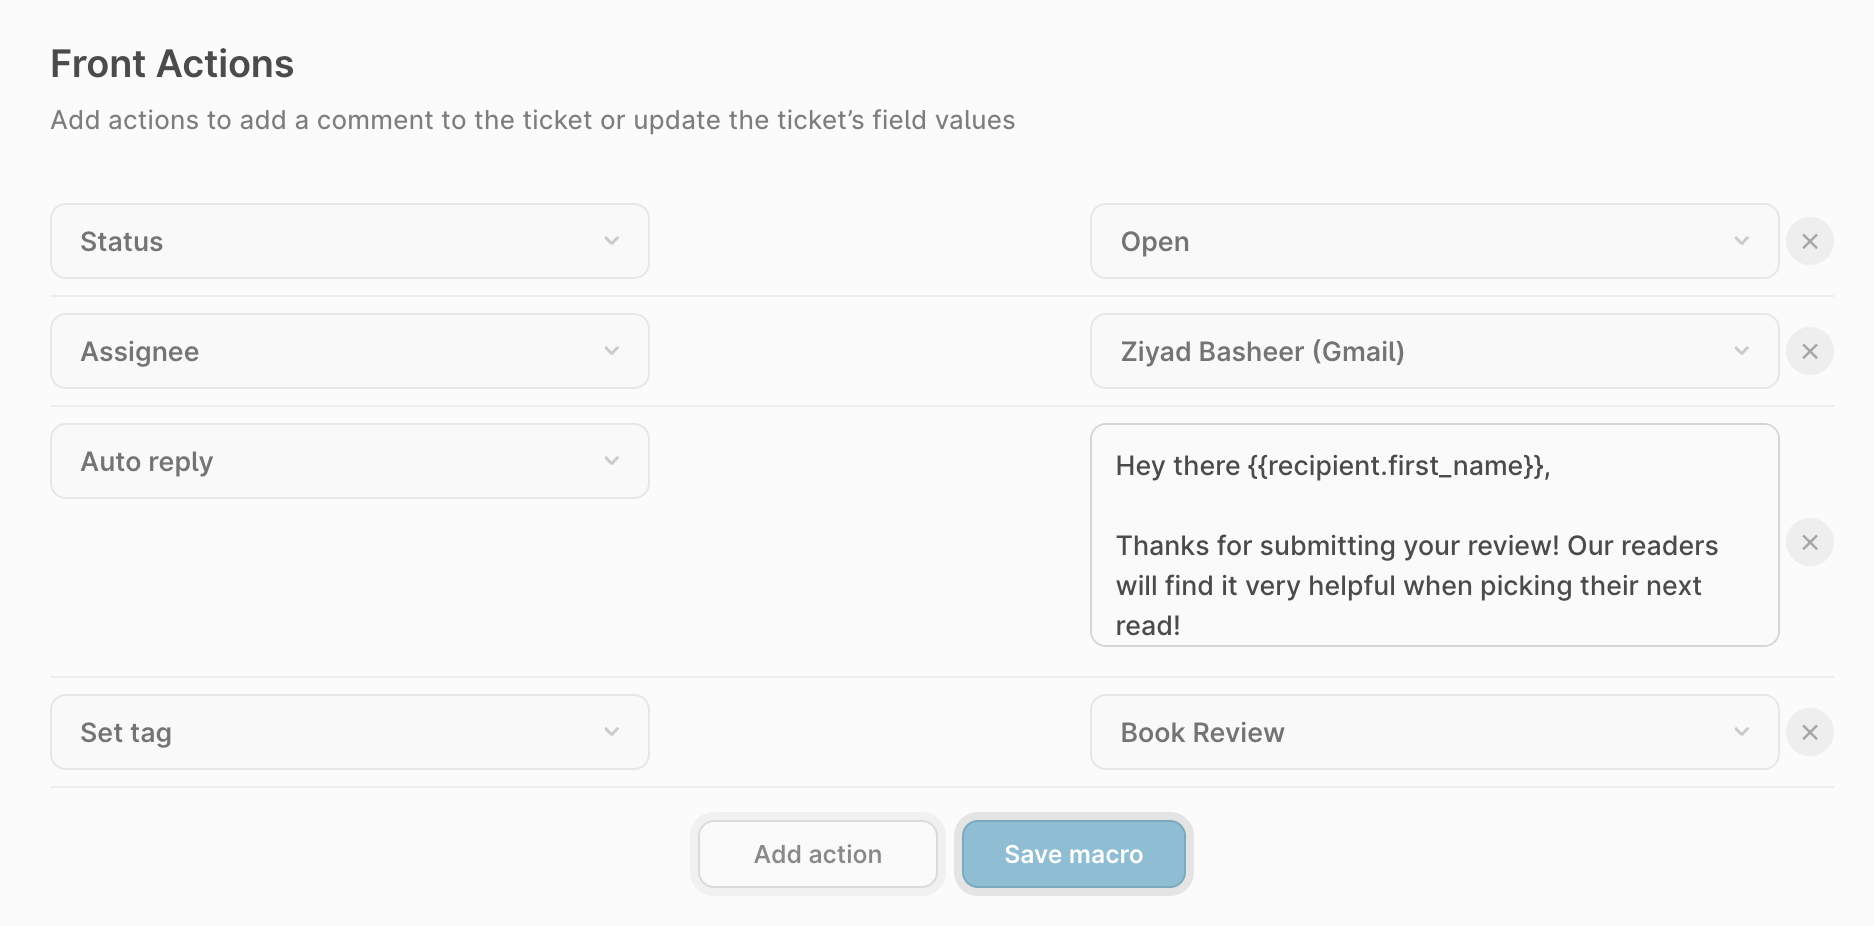
To use Macros in Front, you need to create them manually. Once created, you can add the following actions:
- Set tag - you can select a Front tag to apply for every message that matches this intent. You need to create your tags in Front before they’re available to Aide.
- Set conversation status - apply a status to conversations, Possible values are open, deleted, spam, and archive.
- Assign conversation - triage conversations and assign them to an agent on your team.
- Internal comment - post an internal comment that can only be seen by your team in Front.
- Auto-reply - send a response to your customer directly..
Once you've added the desired actions, save your Macro, Attach it to an intent and set it to either Auto-run or Manual.
To enable Auto-tagging in Front, create a Macro for each tag you want to apply and select “Set Tag” as the action. You'll see a dropdown of all the tags you've created in Front. Remember that you need to create your tags in Front first!
Zendesk Actions
Aide imports your Macros from Zendesk automatically. All of the actions and values you have defined are also imported and instantly available in Aide. Here is an example of a Zendesk macro:
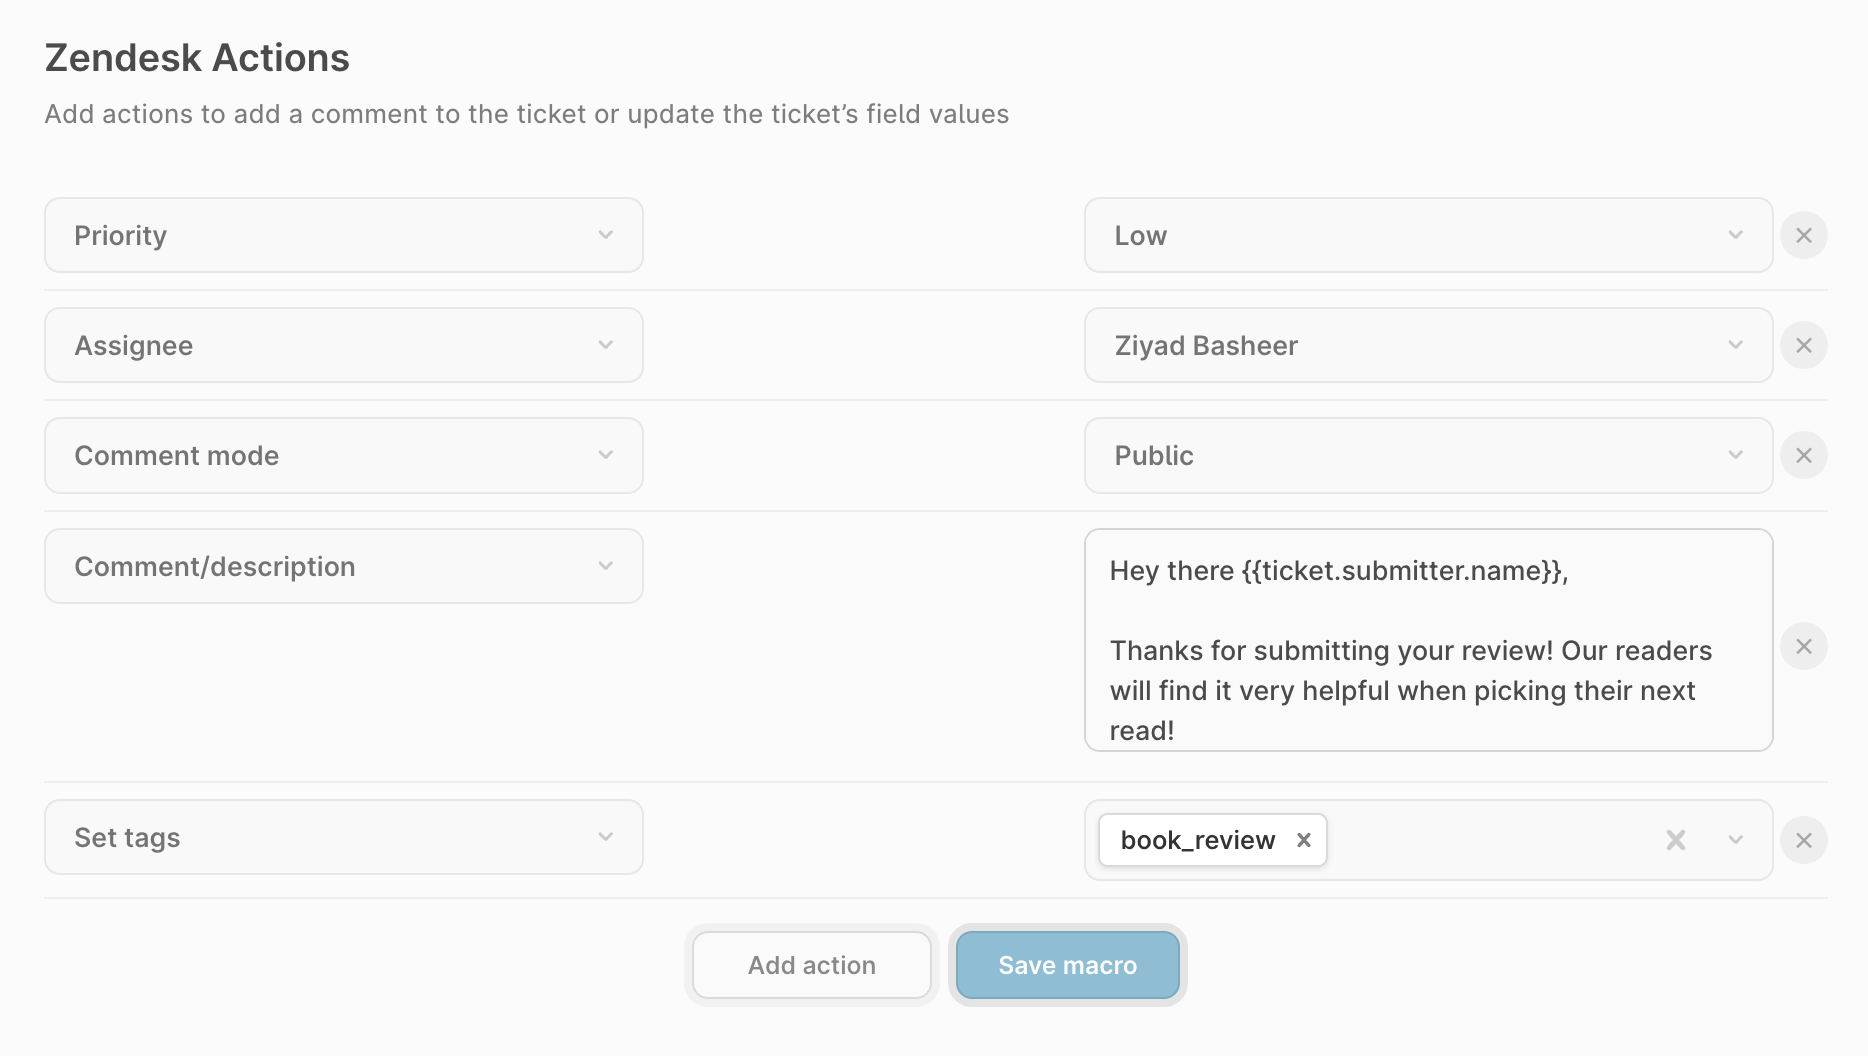
Zendesk Actions that you can add to a Macro include but are not limited to:
- Set tags - you can select a Front tag to apply for every message that matches this intent. You need to create your tags in Front before they’re available to Aide.
- Set status - setting ticket status.
- Set priority - set a priority to a ticket. Possible values are urgent, high, normal, low.
- Assignee - triage conversations and assign them to an agent on your team.
- Comment mode - specify whether the comment to post is Public or Private. Private comments are only shown to your team members in Zendesk, but Public comments are sent to your customers directly.
- Comment - the text you want to post as a public or private comment based on the selected Comment mode.
Once you've added the desired actions, save your Macro, Attach it to an intent and set it to either Auto-run or Manual.
To enable Auto-tagging in Zendesk, make sure that your Macros have “set tags” or “add tags” actions and set them to Auto-run for the intent you want to tag.